
The shortest path
Quick start
- 1Choose body regions
On the home screen, select one or more zones: the head, torso, arms or legs.
- 2Select systems
Enable bones, ligaments, muscles, vessels, nerves, organs and any other layers you need.
- 3Launch the model
Tap the model launch button, wait for it to load and select a structure to view its details.
On first launch, Humio offers a short interactive tutorial. You can skip it and restart it at any time from the settings menu on the model screen.
Build your scene
Home screen

On the home screen, the model is built from the selected body regions and anatomical systems. Select one or more regions and the systems you need; Humio combines them in one 3D scene.
Regions
Choose body parts
Tap zones on the body map: the head, torso, left or right arm, or left or right leg. You can select both arms, for example. Tap a selected zone again to deselect it.
Systems
Add the layers you need
Available content includes bones, ligaments, fascia, muscles, arteries, veins, organs, the central and peripheral nervous systems, the lymphatic system and skin. The exact set depends on the selected region and content version.
- The search field lets you jump to a structure without choosing a scene manually.
- Continue returns you to an unfinished test or saved session when one is available.
- The update card opens an overview of what is new in the current version.
Your main workspace
Using the 3D model
Tap an anatomical structure to select it. A card opens with its name in the selected interface language, its Latin name and a description. Tap an empty area to clear the selection.
Rotate
Drag with one finger. On desktop, drag with the left mouse button.
Pan
Drag with two fingers. On desktop, use the right mouse button.
Zoom
Pinch with two fingers or use the mouse wheel.
Focus
Double-tap to bring the model back to center; the Focus tool centers the selected structure.


Fullscreen mode hides the panels to give the model more room. Use the dedicated button to reopen information about the selected structure.
The redesigned action panel
Model tools
On a phone, drag the bottom sheet by its handle to reveal the tools. On desktop, they sit at the bottom of the left panel. Modes stay active until tapped again; one-off actions run immediately.

Multi-select
Adds structures to the current selection. Use it before isolating, hiding or testing a group.
Test
Builds a knowledge check from the selected structure or group. Select something first.
Hide
Hides all selected structures. Use Undo to restore them.
Scalpel
Turn the mode on, then tap structures to remove them from the scene one by one.
Isolate
Leaves only selected structures visible. Tap again to restore the scene.
Focus
Centers the camera on the selected object or on the full model when nothing is selected.
Section
Opens a matching sectional model for the selected structure when available.
Undo
Restores the previous visibility, isolation or color state.

Now separate actions
Systems, layers and anatomical relations
In the current interface, systems, depth and relations have separate controls. This is an important change from the old version, where the same arrows changed behavior depending on selection.
Anatomical systems
Open the systems list and toggle bones, muscles, vessels, nerves, organs and other layers while you work.
Deeper / higher
Depth buttons progressively remove or add levels of the current model. An unavailable direction is disabled automatically.
Relations
After you select a structure, the Relations button shows related elements such as attached muscles, supplying vessels or innervating nerves. Results depend on the structure type and model data.


Quick model settings
The settings button at the top opens model reset, background choice, structure coloring, labels, name and description audio, and the interactive tutorial.
To show or hide anatomical labels, use the labels toggle in this model menu.
More than an atlas
Learning and lessons
Learning contains the anatomy course catalog. Choose a system, open its lesson list and start a topic. Completed lessons are marked, and an unfinished lesson can resume from the saved position.


- Lesson, Summary and Terms tabs let you choose how deeply to study a topic.
- Tap a highlighted term in the text to reveal and focus the matching structure. Illustration links open an image.
- Audio lessons support play, pause, moving between segments and automatic model focus changes.
- Use the Aa button to change text size.

Resuming and moving between lessons

- If you stop partway through the text, reopening the lesson offers to resume reading. Choose Continue to return to the saved tab and position, or Start again to read from the beginning.
- Previous lesson and Next lesson switch topics without returning to the catalog. They appear when the corresponding adjacent lesson is available.
- Moving to the next lesson marks the current one complete. View progress and reopen a completed topic in the lesson list.
Check your knowledge
Tests and statistics
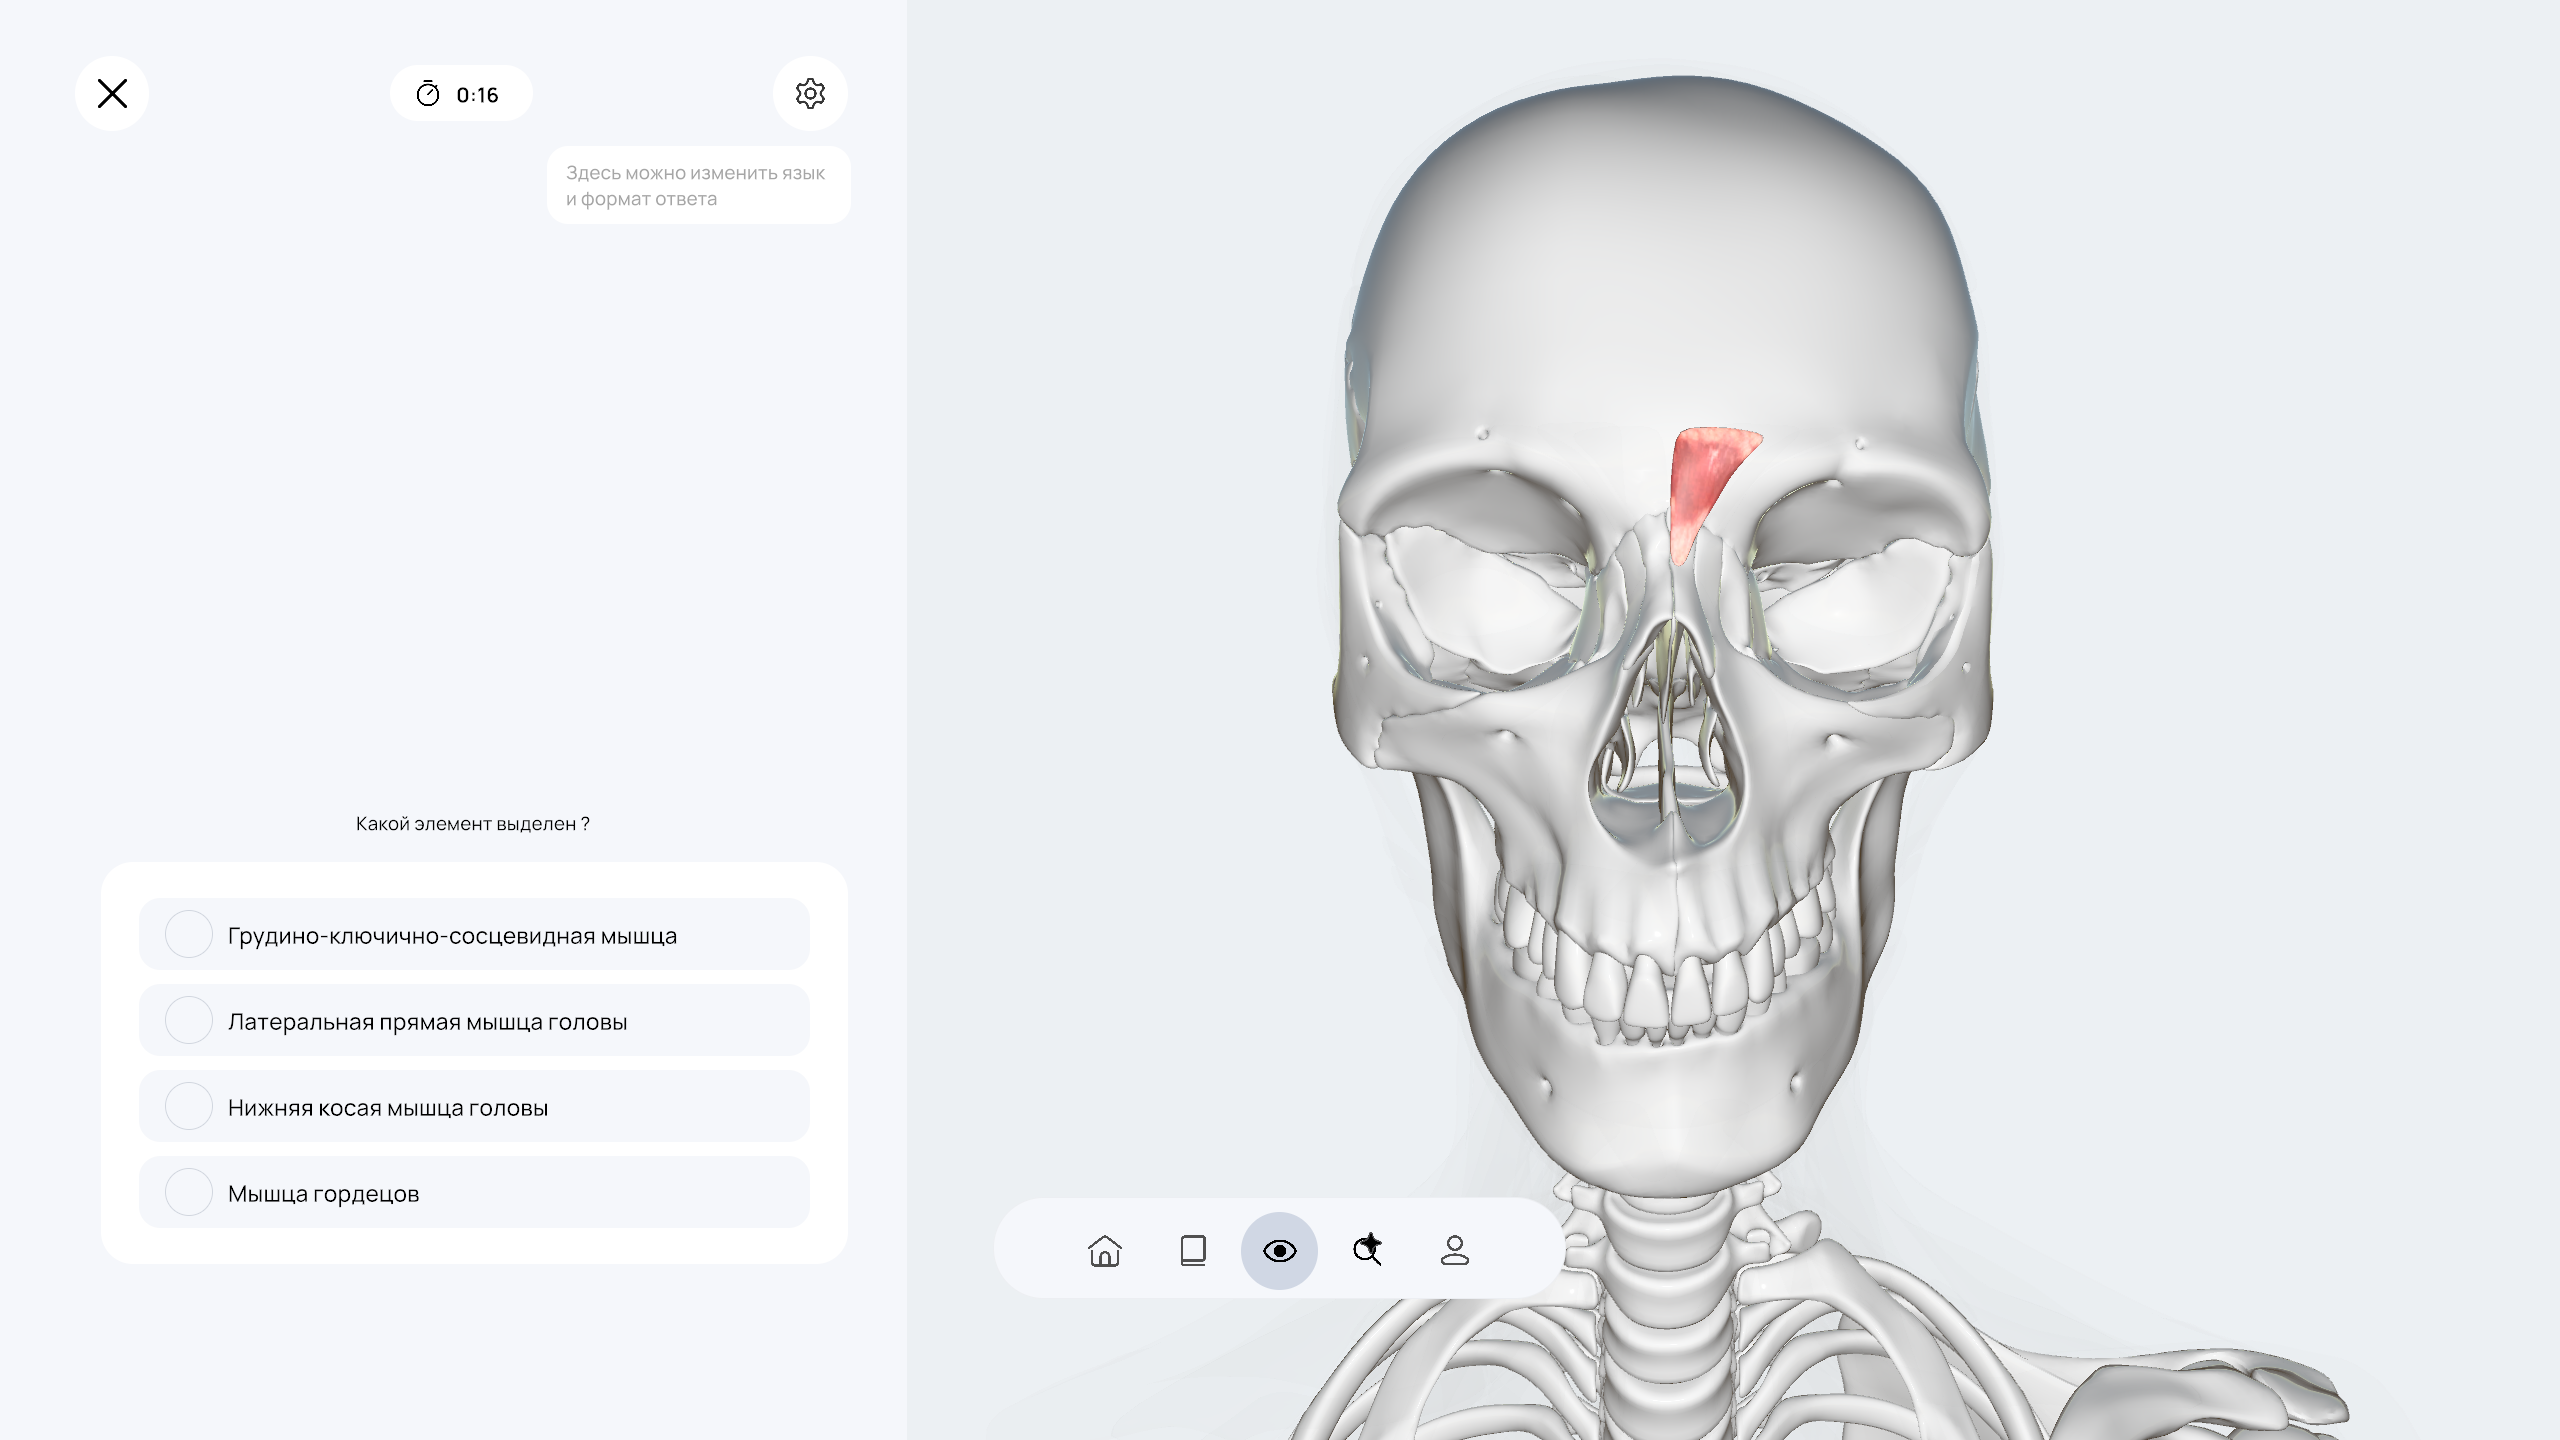
To start a test from the model, select one or more structures and tap Test. If the selection has labels, questions are built from them; otherwise the test uses visible structures from the same anatomical layer.
Mode 1
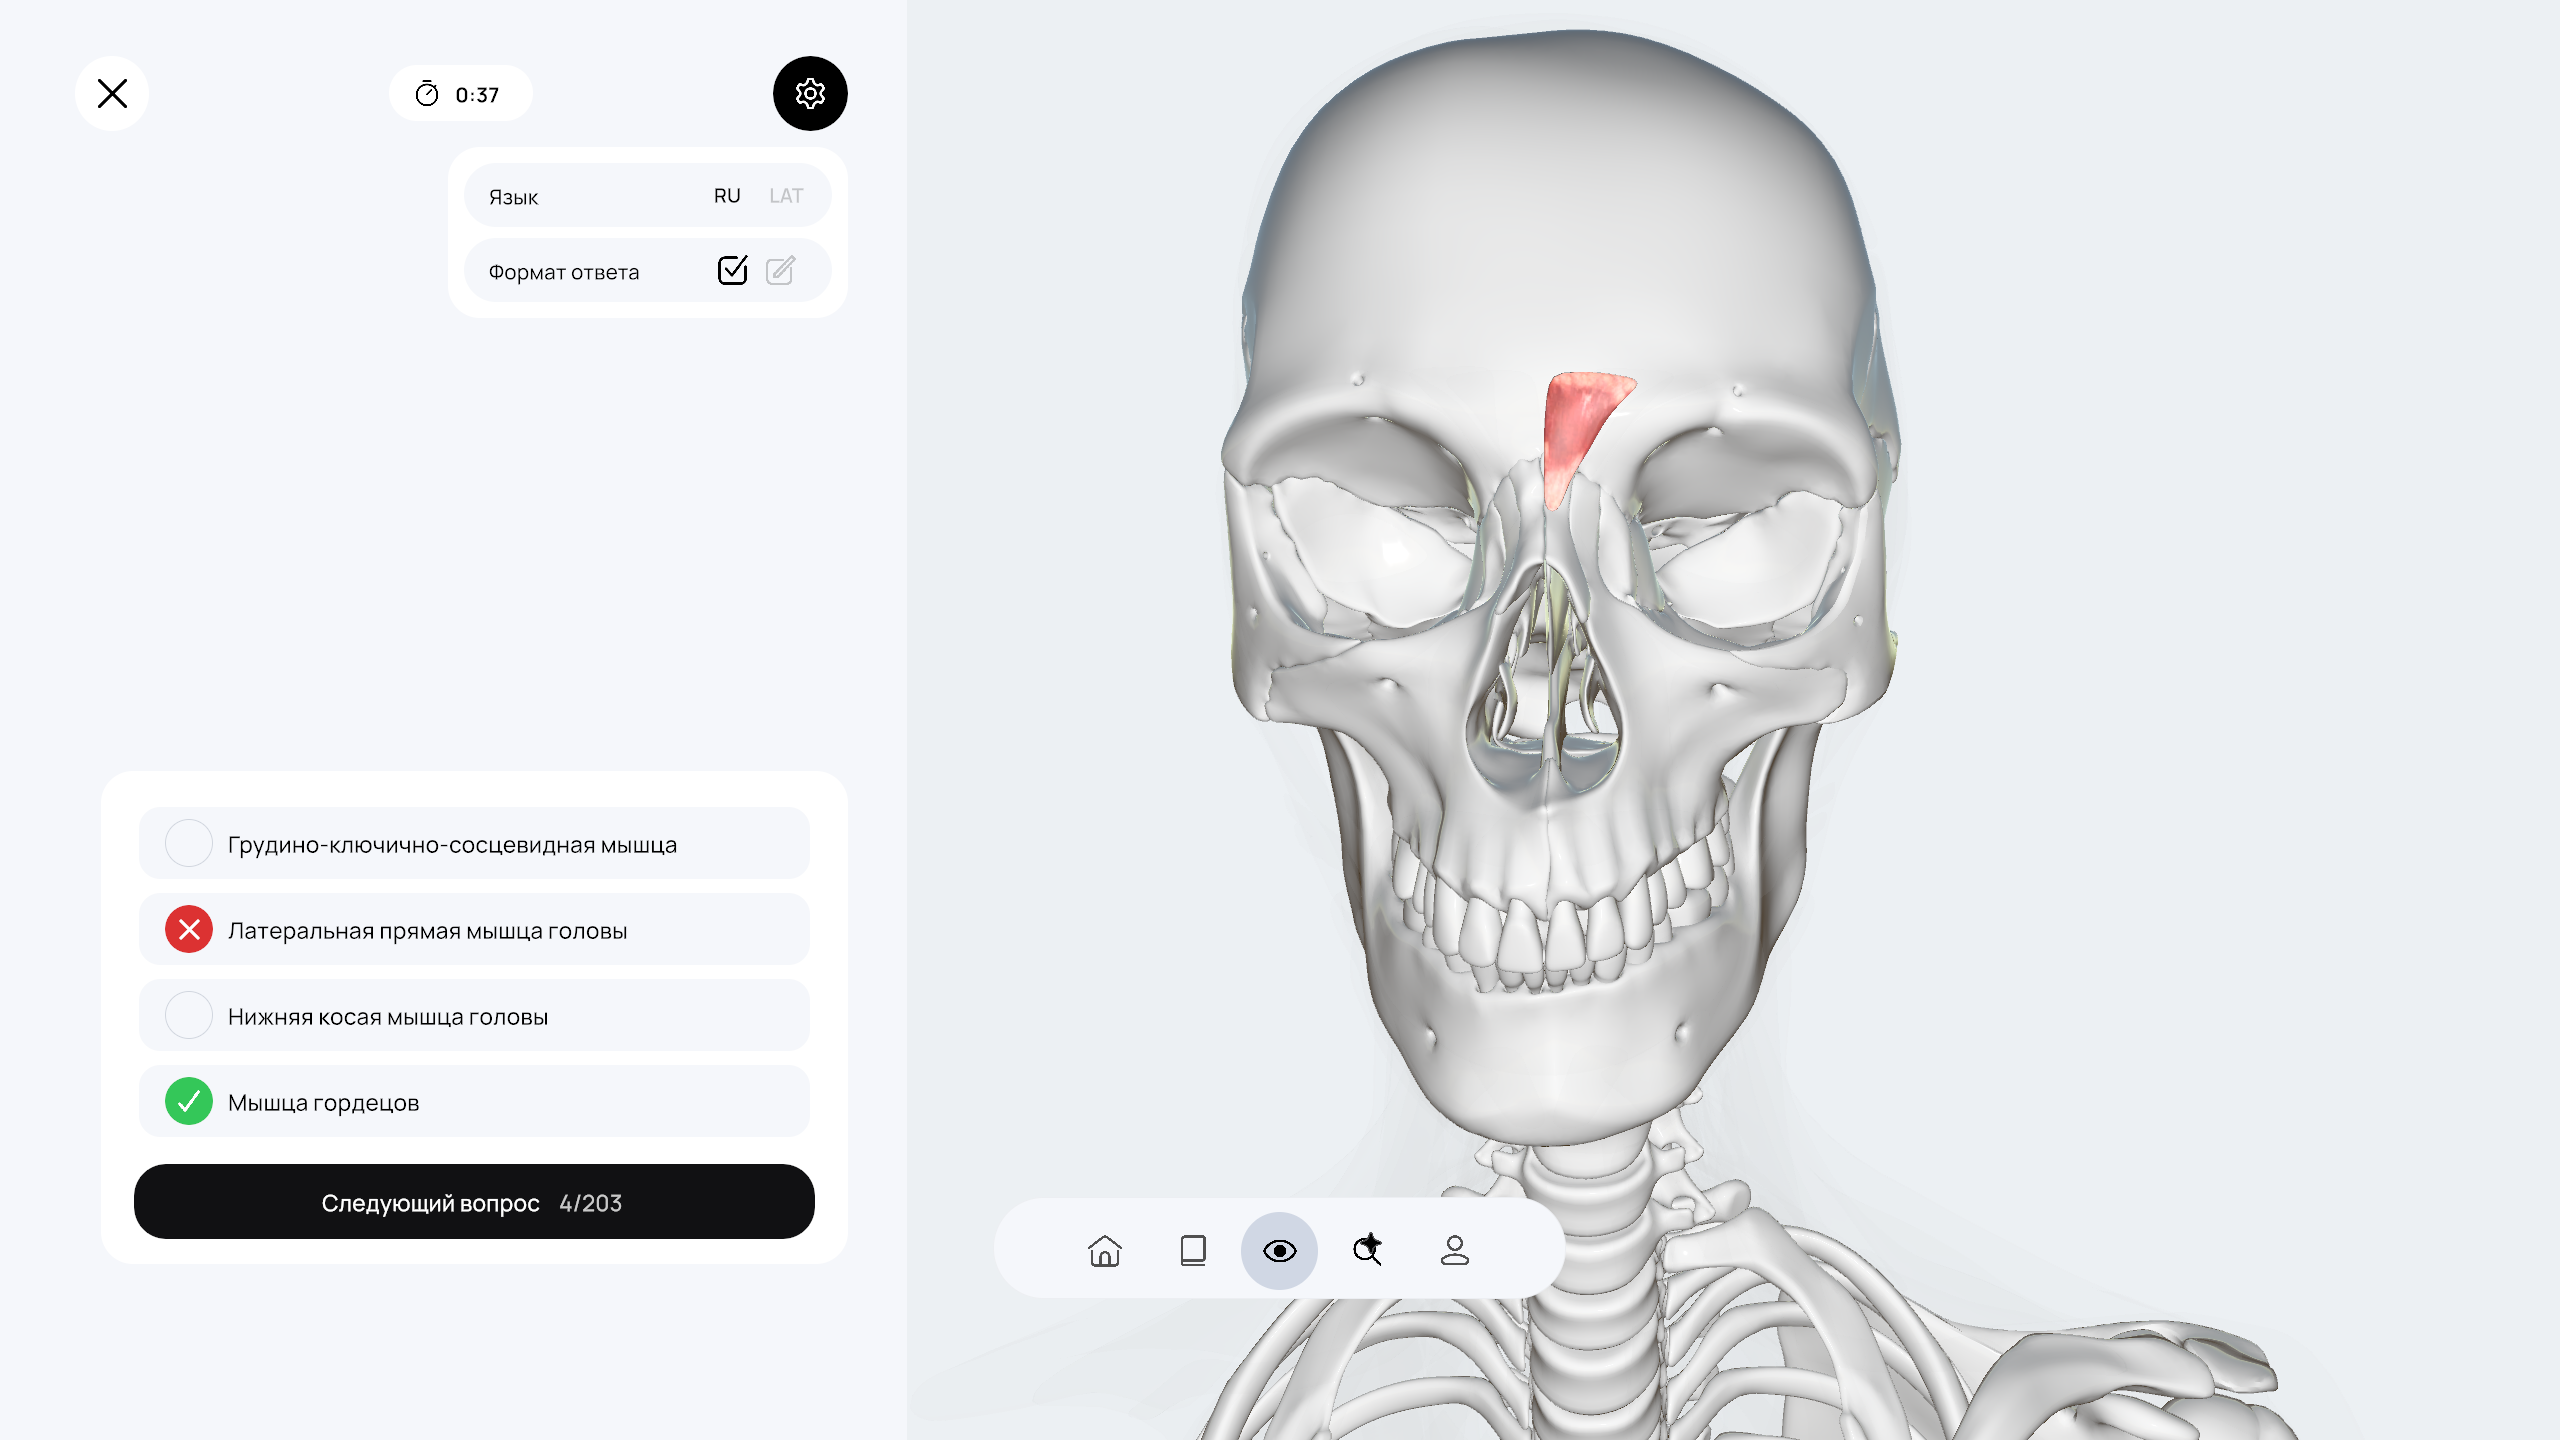
Multiple choice
Choose the correct option from the suggested answers.
Mode 2
Typing
Start typing the name and choose the matching suggestion.
During a test
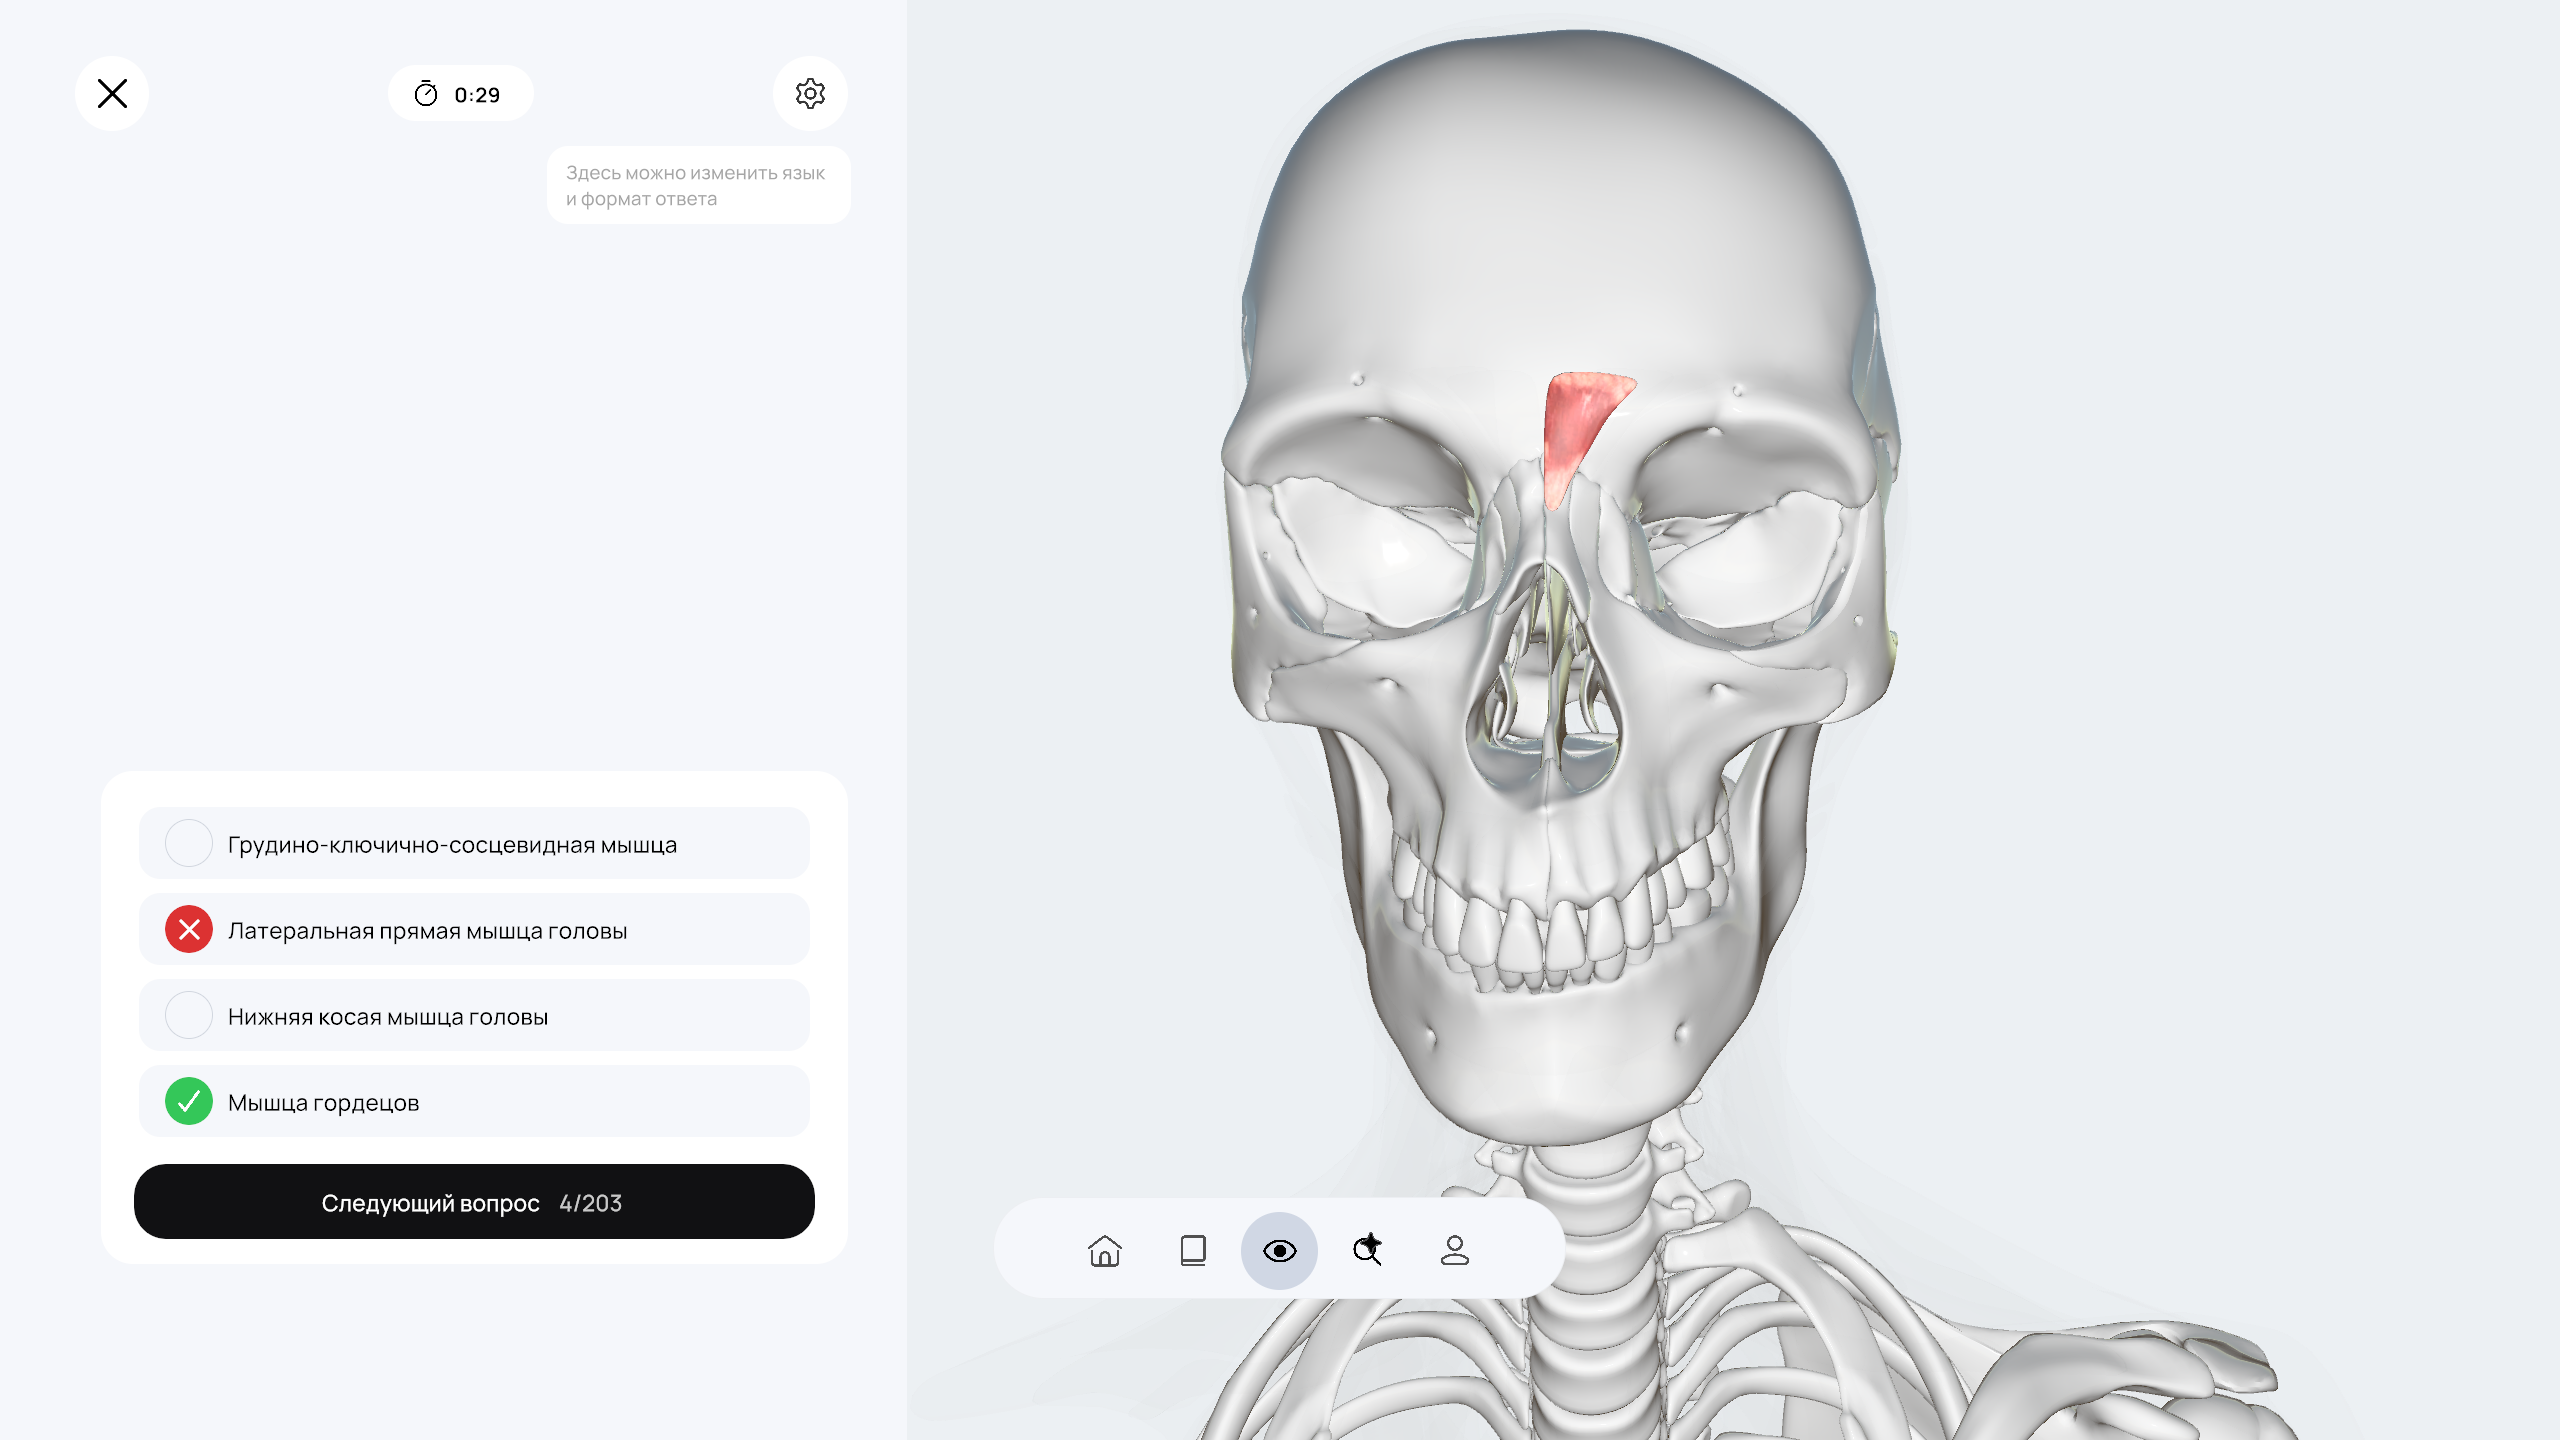
- Open the gear menu to choose the question language (the current interface language or Latin) and the answer format.
- Inspect the highlighted structure, choose an answer and review the feedback. Then tap the next-question button.
- The timer shows the time spent on the current attempt. After the last question, the results screen opens.
The cross at the top of the test ends the attempt and opens its result; it is not a pause button. If the app has saved an unfinished attempt, resume it using Continue on Home.
Results and reviewing mistakes
On the results screen, review correct answers, percentage and elapsed time. If there are mistakes and available targets to retry, use the mistake-review button to start a test on the structures you answered incorrectly instead of repeating the whole topic.
To compare attempts, open Profile → My tests. It contains attempt history, session count, average score and best score. Select a history entry to view its result.
Reach the right structure faster
Search and notes
Search
Search by name
Search helps you find structures in 3D models. Enter a name in the selected interface language or Latin. Selecting a result loads the matching scene and focuses the object.
Notes
A saved model view
The Notes button on the model screen saves selected structures, layer visibility and camera position. Name the note so you can find it later and restore the same view.


The notes list includes search. Saved views can be opened or deleted. If the required model is not loaded, Humio prepares the matching scene first.
Personalization and help
Profile and settings
Profile contains account details, access status, test results, promo codes, app sharing and help. Here you can change your name, email and profile photo, sign out or delete the account after a separate confirmation.
How to apply a promo code · How to delete an account · How to prepare for offline use


Sync and full functionality
Account and access
Registration
Create an account with email or an available social sign-in button: Yandex ID for the Russian region, or Google where supported. The buttons depend on region and platform. Email registration requires a verification code sent to your inbox.
Sign-in and recovery
Use the same method you used to create the account. Password recovery is available for email sign-in.
Purchasing access
Open the access card on Home or in Profile, choose an available plan and follow the store instructions. Current prices, trial duration and payment methods are always shown in the app.
If paid access is missing
Check your internet connection and sign in to the Humio account used for the purchase. For App Store purchases, Restore purchases is available on the plan-selection screen; use the same store account. If the button is missing or access is not restored, contact support with the purchase date and store. You do not need to pay again to check access.


How to apply a promo code

- 1Open Profile → Promo code
Sign in to the intended Humio account and connect to the internet.
- 2Enter the code
Enter the promo code without extra spaces and press the confirmation button.
- 3Check the result
On success, Humio shows confirmation and the updated access end date. If the code is not accepted, check its spelling and the offer conditions; contact support if needed.
How to delete an account
Deleting an account is not the same as signing out. To switch users, choose Sign out instead.
- 1Open Profile → Delete account
Read the warning in the dialog. Your account is not deleted until you confirm the action.
- 2Confirm the account email
Enter the current account's email address. If it does not match, the app will not complete deletion.
- 3Confirm deletion
Proceed only if you intend to delete the account. Wait for the result message; after successful deletion, Humio returns to the sign-in screen.
If your store subscription renews automatically, manage it separately in your store account: deleting a Humio account does not replace canceling the subscription. An App Store subscription-management button may appear in the deletion dialog. Do not confirm account deletion just to stop renewal.
Available features can vary by platform, app version, country, account type and active access. If a button is missing, update Humio and check your access status in Profile.
Prepare in advance
Offline access
Without an internet connection, you can use materials already available on the device while offline access remains valid. A subscription does not download all content automatically: prepare the models and materials you need in advance.
- 1Sign in while online
Open Profile and check that your subscription or trial is active. The app needs an online connection to verify access.
- 2Open the models and lessons you need
Wait for each required scene and lesson's materials to finish loading. If you plan to listen to audio, check playback in advance. New models and materials that have not been downloaded are unavailable offline.
- 3Check offline access
In Profile, check the remaining offline time in the subscription card. Before a trip, open the prepared lesson or model without a connection to confirm that everything you need is available.
When offline access expires, reconnect so the app can verify access. Do not sign out or clear app data before working offline: the saved session and downloaded content may be needed. Sign-in, purchases and promo-code redemption require a connection.
Still have questions?
Contact Humio support
Include your platform, app version and the step where the issue occurred.